Tile grout is the cement-like material that fills the joints between floor and wall tiles. Traditionally, tile grout was often white. In modern design styles, however, grout itself can be used creatively by incorporating a grout color that compliments or contrasts with the surrounding tiles or fixtures. In this post, our experts explain how you can change tile grout color to suit your needs — whether you want to remove stains, tint existing grout or replace tile grout with a new color. Let’s dive in.
3 Ways to Change Tile Grout Color
In some cases, we simply want to remove unsightly grout stains and restore the grout’s original color. In other cases, it’s high time for a dramatic change. The following three methods can help you achieve the perfect grout color to match your desired style:
- Clean or remove stains from existing grout
- Tint/recolor grout (may also be used to conceal stubborn stains)
- Replace grout with a new color
Read on as we explore each method.
How to Remove Stains From Grout
Whether stained by dirt and grime, kitchen spills or mold and mildew growth, grout can be cleaned with common household items. To remove stains, homeowners can try using white vinegar to clean the area, followed by a paste made by mixing water and baking soda. Use a toothbrush to scrub the paste into grout lines, then rinse with clean water.
It’s important to note that vinegar is acidic. It’s important to ensure your tiles can handle acidic substances before using this method. Tiles like marble are in danger of etching when they come into contact with acidic substances. Commercial grout cleaners are also available.
How to Change Tile Grout Color with Tinting or Recoloring
This method works for glazed ceramic or porcelain tiles, but when it comes to unsealed natural stone tiles, colorant will seep in and stain your tiles. Always check with a manufacturer to ensure your chosen method for changing tile grout color is safe for your existing tiles.
Finding the best grout colorant for your tiles may require some trial and error. It’s worth noting that for best results, it’s easier to change grout to a darker color. If you desire a lighter color, multiple applications will likely be necessary. Some tile grout colorants may not work well on epoxy grout or won’t work on grout that has been sealed. The more you know about your existing grout, the easier it will be to find an appropriate colorant.
Here’s what you’ll need to recolor grout lines:
- Scrub Brush
- Bucket
- Sponge
- Colorant Brush/Toothbrush
- Tile Grout Colorant
Let’s take a look at how to recolor tile grout:
Step 1: Scrub Existing Grout Lines
Use a scrub brush and commercial grout cleaner to scrub existing grout. Then, use a sponge to wipe tiles with clear water, rinsing the cleaner from the tiles and grout lines. Allow tile and grout to dry fully — ideally overnight — before coloring.
Step 2: Test Colorant
Find an inconspicuous area to test the colorant. Apply colorant to a few inches of grout as per the manufacturer’s instructions and allow it to dry. Once fully dried, check to ensure the colorant sets to a hard finish that doesn’t flake off with scrubbing. If it doesn’t hold up, you’ll want to test a different type of colorant.
Step 3: Tape/Mask Tiles
While this step is optional, making off tiles with painter’s tape can protect unsealed tiles from getting stained by colorant. Work in small sections, and always test a hidden area first to see if the method works.
Step 4: Apply Colorant
Follow the manufacturer’s directions to apply grout colorant with a small brush, toothbrush or provided pen. It’s best to avoid getting colorant on tile surfaces.
Step 5: Wipe Off Excess Colorant
Carefully wipe off any excess colorant and allow grout to dry completely. Seal if necessary.
How to Replace Tile Grout
For extreme color changes or to fix severely stained or damaged grout lines, replacing grout is likely a better long-term solution. In this case, you’ll have to remove the existing grout and replace it with the new grout in your desired color. As grinding out existing grout can be labor-intensive, it’s a good idea to test a grout colorant or tint first to see if this solves the issue. If replacing grout is the best course of action, here’s what you’ll need:
- Grout saw
- Protective Gear
- Flat-Head Screwdriver
- Scrub Brush
- Shop Vacuum
- Mixing Bucket and Trowel
- Grout Sponge
- Drop Cloths
- New Grout and Pigment
- Grout Sealer
Step 1: Remove Existing Grout
Protect floors and furniture with drop cloths, then remove old grout using a manual grout saw or comparable tool. This can be a labor intensive process that produces lots of dust, so be sure to wear breathing and eye protection. Utilize a flat-head screwdriver to get into tight spaces. Check tiles to ensure they are secured to the substrate/backing. If not, tiles may need to be replaced or reattached, as replacing old, crumbling grout may not be enough to fix the problem.
Step 2: Clean Up Grout Particles
Use a shop vac to clear out any dust, debris or loose grout particles from grout lines.
Step 3: Prepare New Grout
Grout comes in a range of factory-mixed colors, but you can always add a desired pigment to grout to get exactly the effect you’re going for. Be sure to blend pigment and grout thoroughly to ensure uniform coloration.
Step 4: Apply New Grout
Follow the manufacturer’s instructions to apply new grout. This process typically involves filling the joints in between tiles, removing any excess grout and cleaning surrounding tiles. Allow grout to dry and cure fully before using the surface, then seal grout lines if necessary (some grout mixes incorporate a sealant).
Sealant can darken grout color and give it a shiny appearance. Always test an inconspicuous area first to ensure you get the desired effect. Allow sealant to dry fully before allowing tiles to get wet.
Work With Cosmos SurfacesTM
Cosmos SurfacesTM is a 2nd generation, family-owned business dedicated to providing you with knowledge, excellent customer service and high-quality surface materials. We offer a wide range of tile products and we’re always happy to answer questions and provide expert advice. Contact us today to get started!
Color of the Month: Mercury
Mercury is a soothing mid tone gray with warm, brown undertones. Pair it with neutral blues and greens to make these colors stand out beautifully. Mercury is perfect for accent walls and main walls.
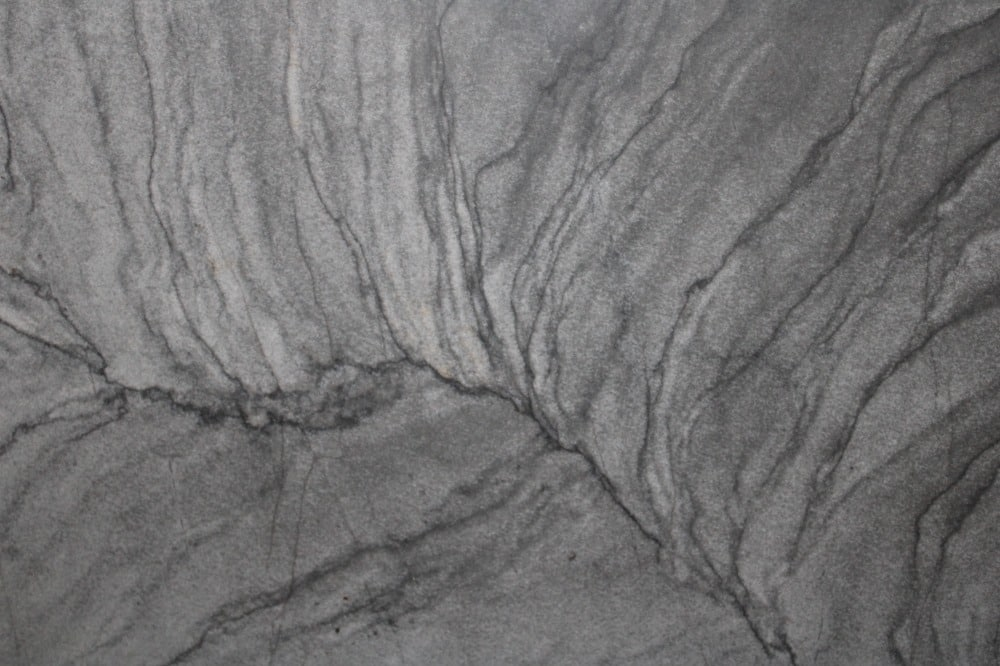
Originating in Brazil and meaning Silver Sea, Plata de Mar is a striking quartzite that is available in multiple finishes. Sail across a stormy ocean by installing Plata de Mar as a kitchen countertop, or create a cool and modern aesthetic by installing it as a bathtub foundation or bathroom flooring. Quartzite is resistant to scratching, staining, and fading, and the beauty is unmatched.
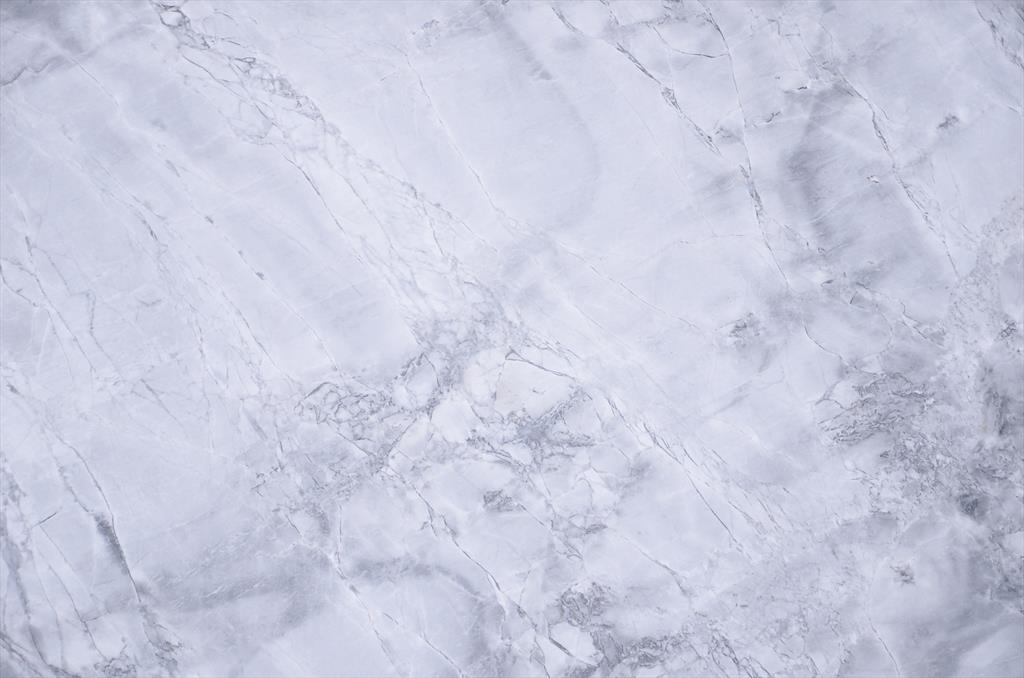
Luce Di Luna is an elegant, intricately textured type of dolomite marble. Thanks to naturally occurring, often intersecting lines in the stone, it’s easy to get lost in the pattern. Fittingly, its name translates to “light from the moon,” which perfectly describes its soft and brilliant white-gray coloring. It is commonly used for countertops, floors and interior walls.